
A Virtual Well is a simulated or synthetic well created within the system to support modelling, forecasting, and decision-making. It allows users to run what-if scenarios without requiring measured field data, making it especially valuable in early planning stages or when testing conceptual development options. By configuring user-defined parameters such as production rates, decline assumptions, or reservoir properties, Virtual Wells help teams explore outcomes under different development strategies.
For Virtual Wells, we capture both the well position (latitude and longitude) and the bottomhole location—commonly referred to as the toe in horizontal wells. This allows wells to be placed on a map in a way that shows how they interact spatially with existing or planned wells. This visualisation supports development planning, including evaluating well spacing, minimising inter-well interference, and optimising field layouts for maximum recovery and efficiency.
How to create a Virtual Well:
Virtual Well can be created in Project Level or in a Group Level:
-
Project Level:
Once the user has created their Project: click on the 3 dots options, followed by clicking on add Virtual Well as demonstrate in the figure below:
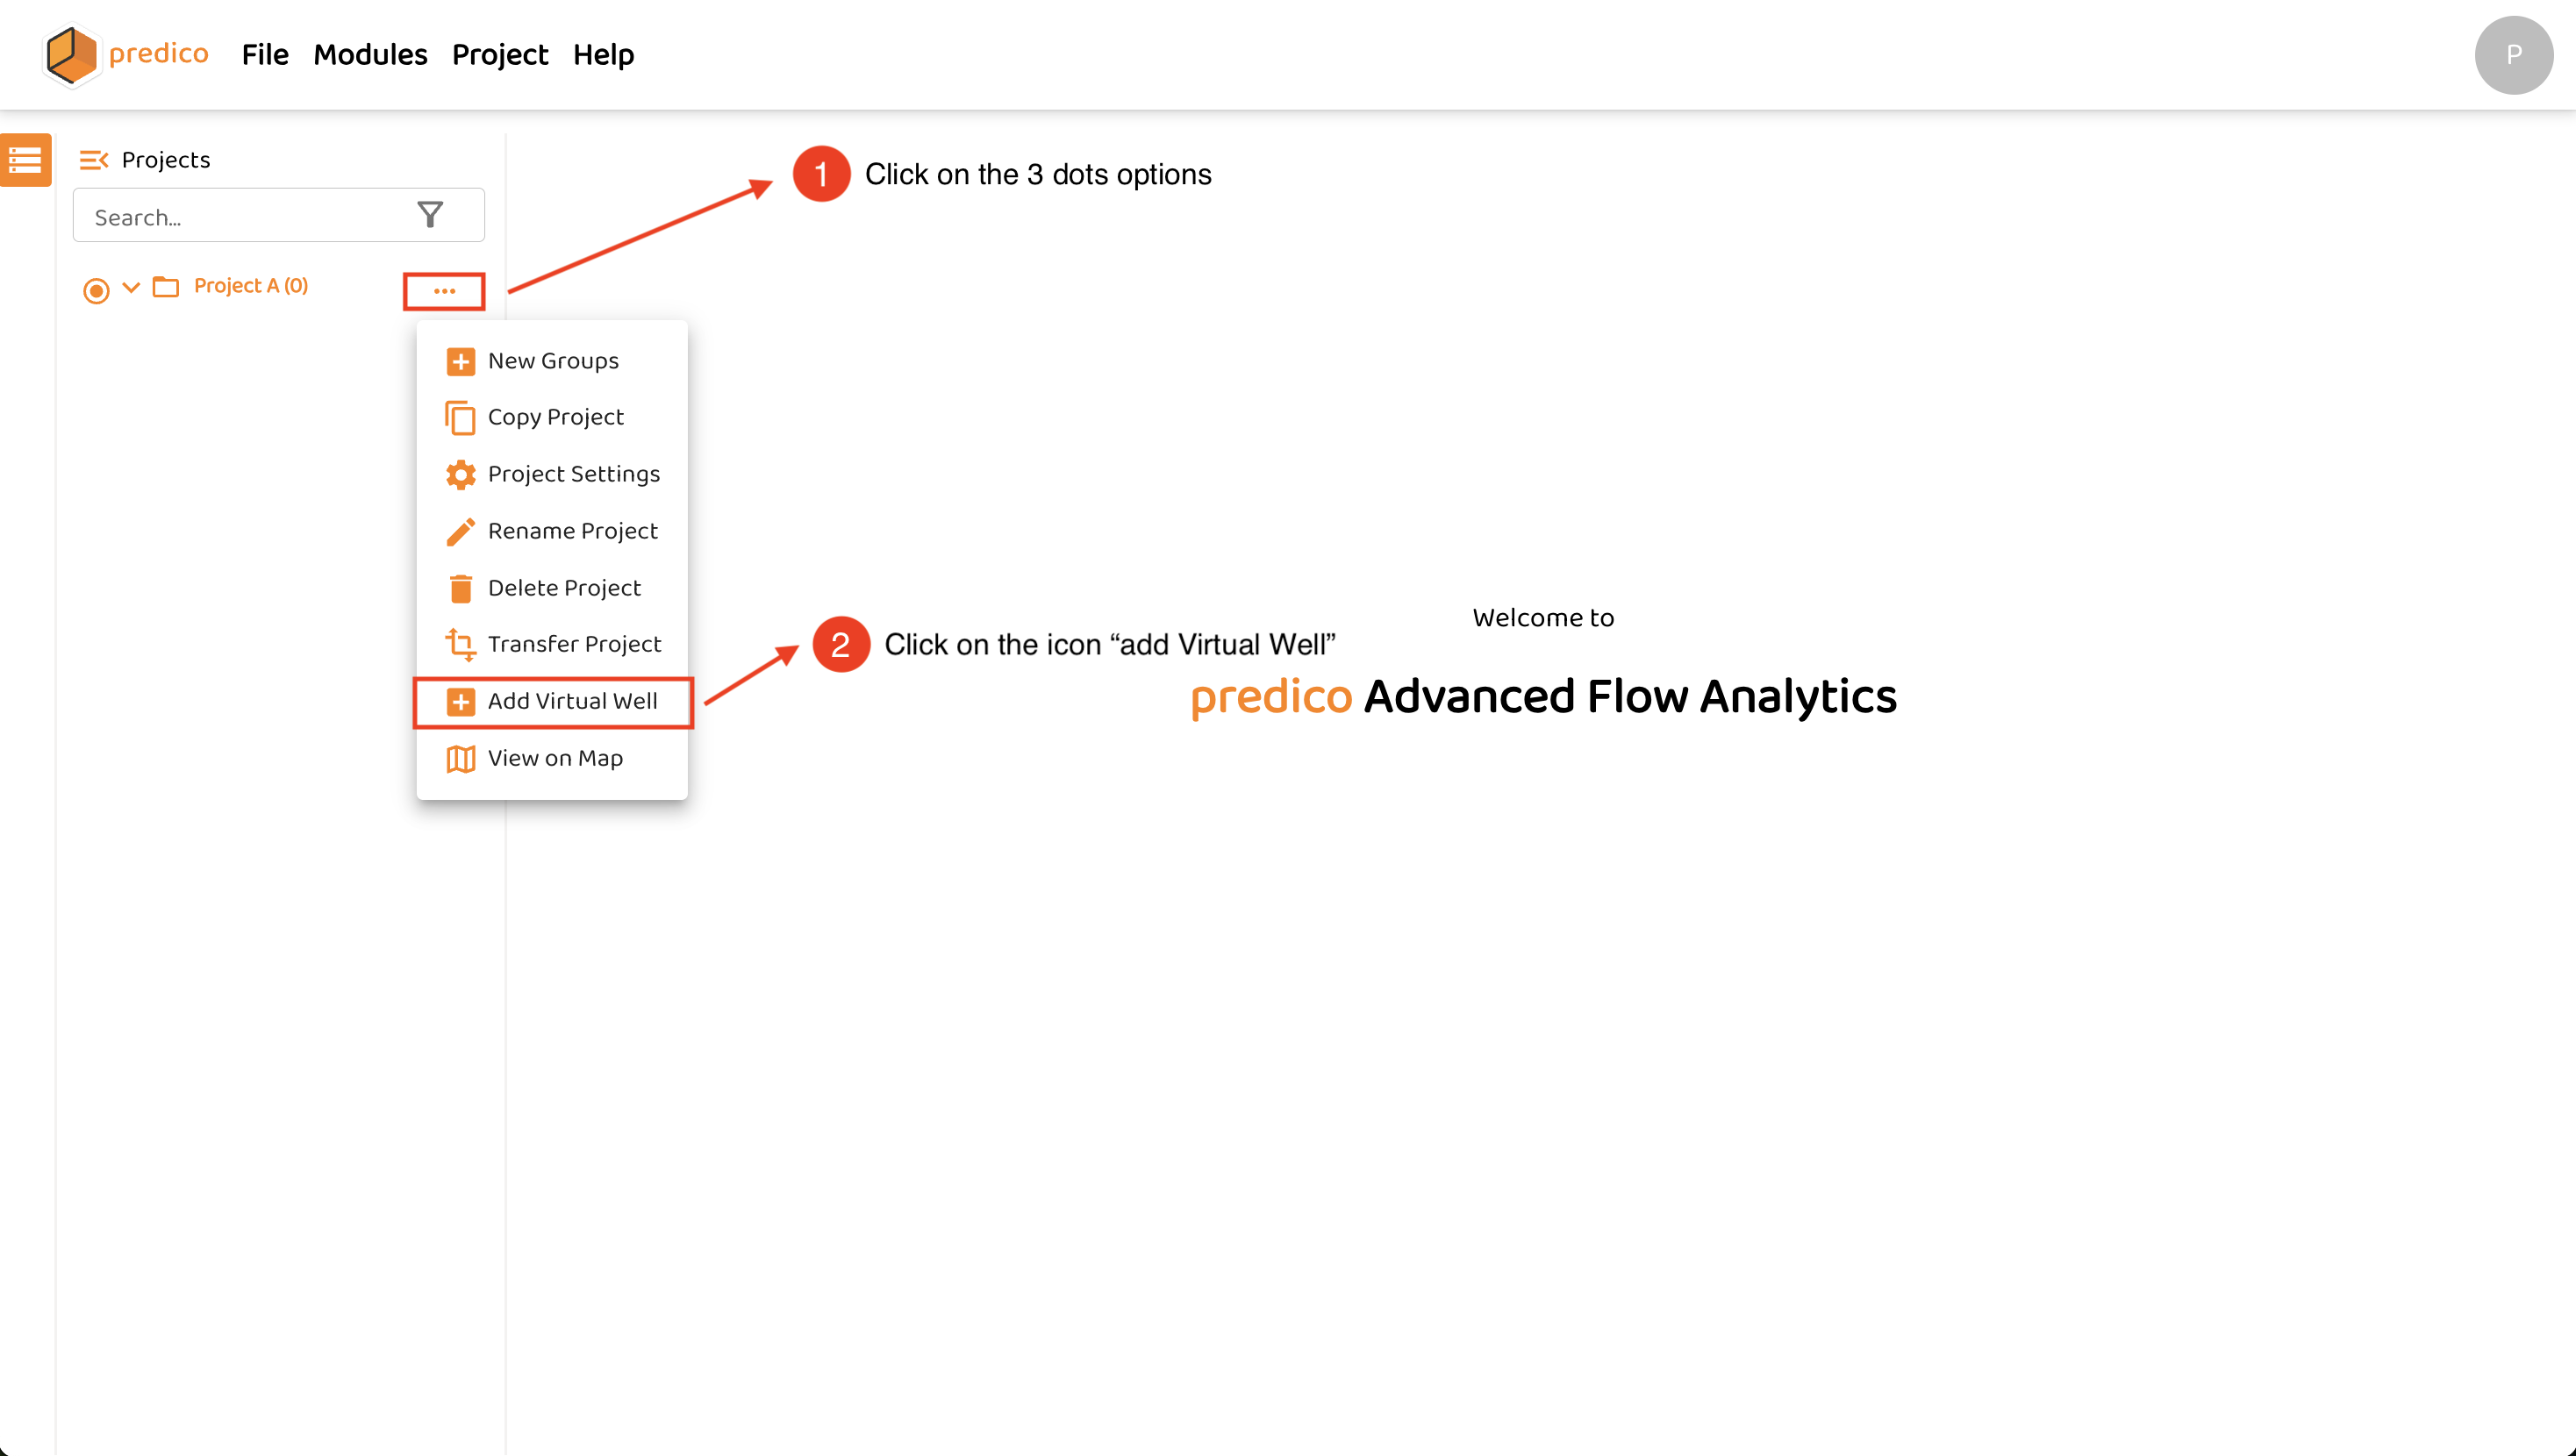
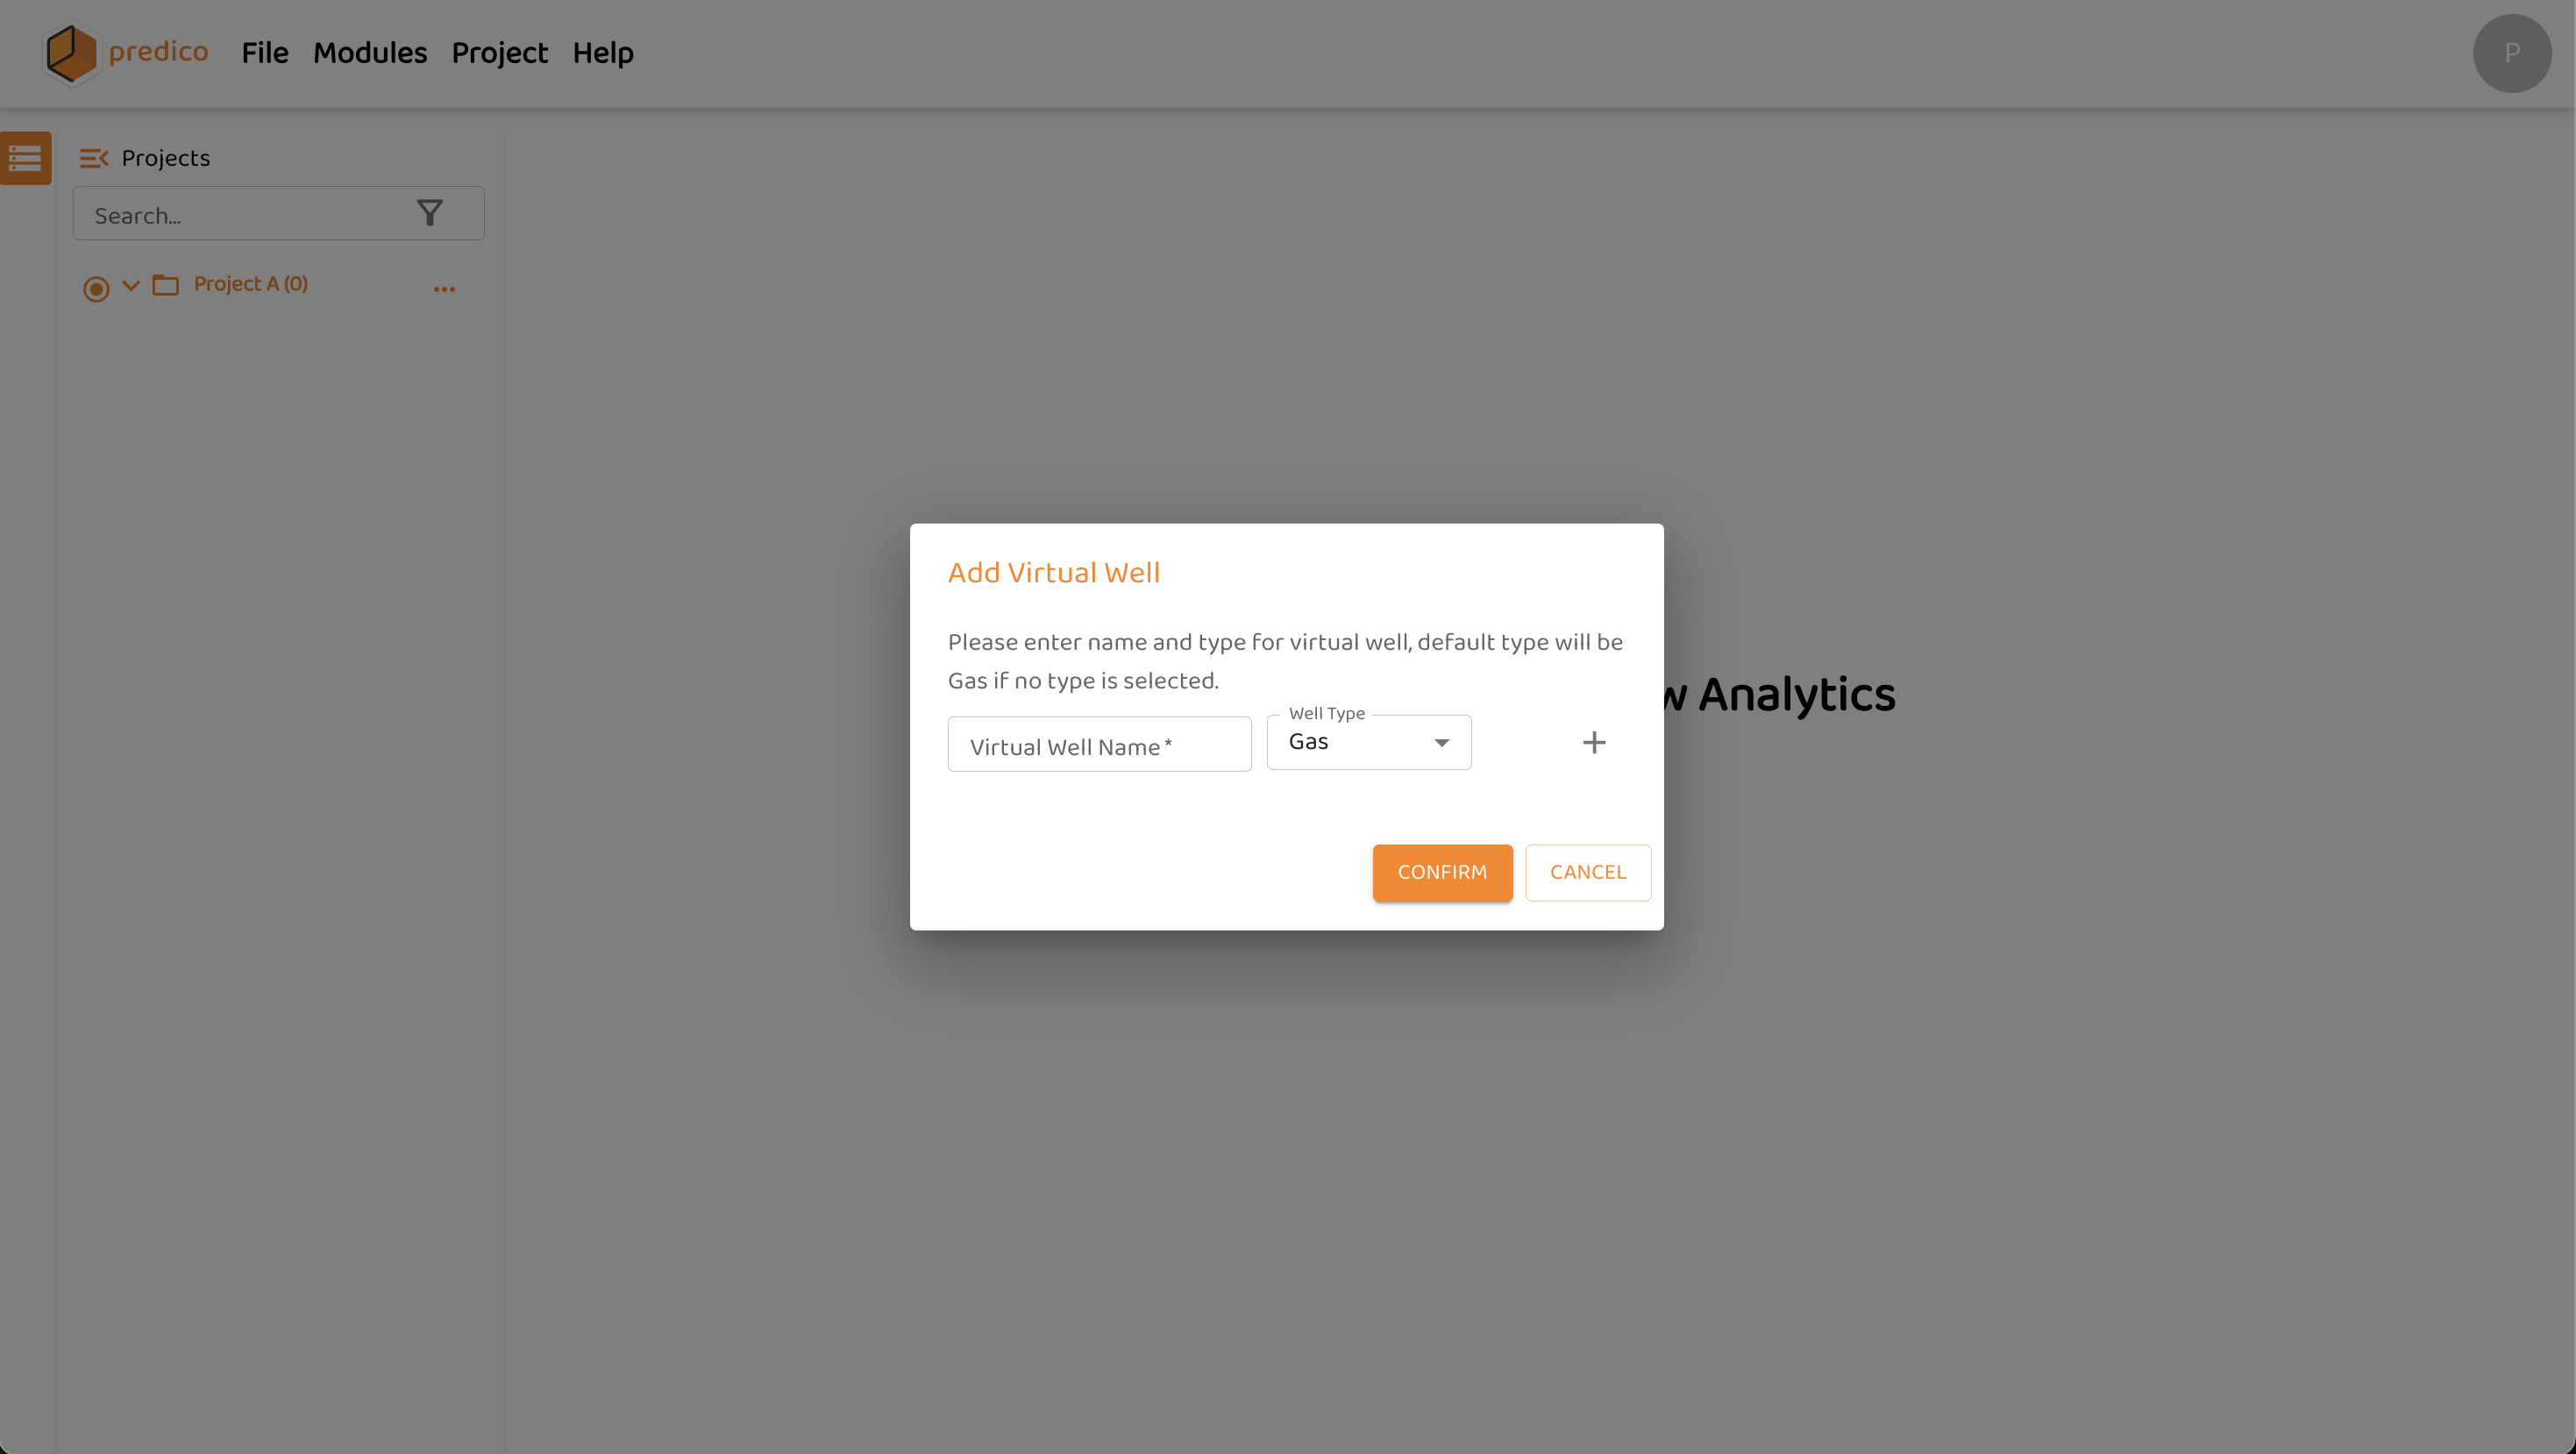
After clicking on add Virtual Well, a new window will pop up for user to fill some virtual well information, such as Virtual Well Name and Well Type, as illustrated by figure below:
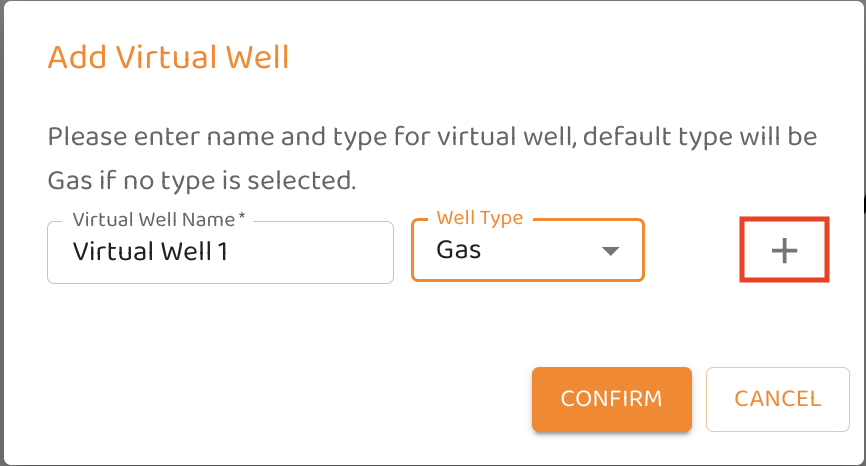
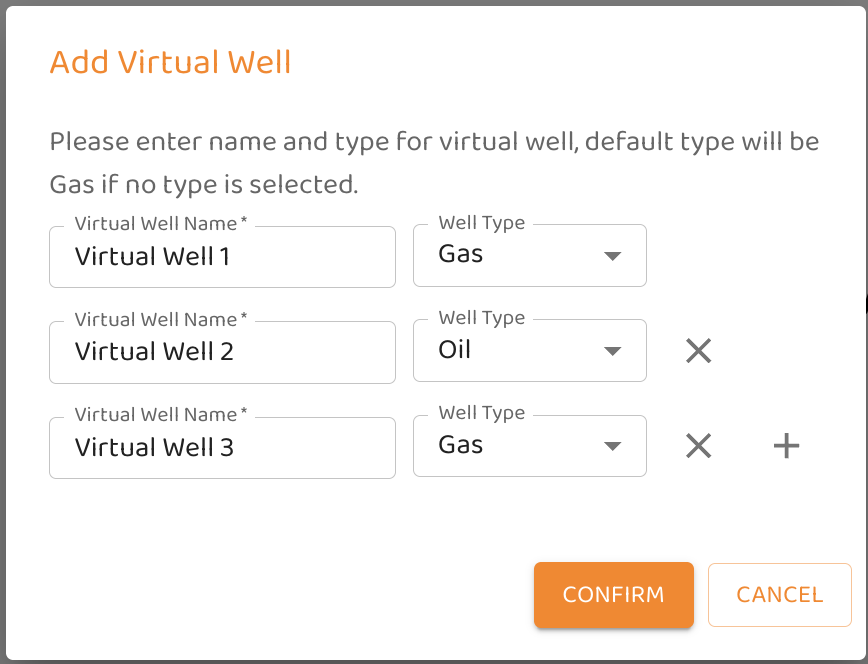
AFA has the capability of create multiple Virtual Wells at once. To do that, the user just need to click on the plus icon, and create as many Virtual Wells as desire. When the user is done in creating Virtual Wells, the user just need to clink on confirm button, please see figures below:
After create Virtual Wells, the project will be populated with all Virtual Wells created, as figure below:
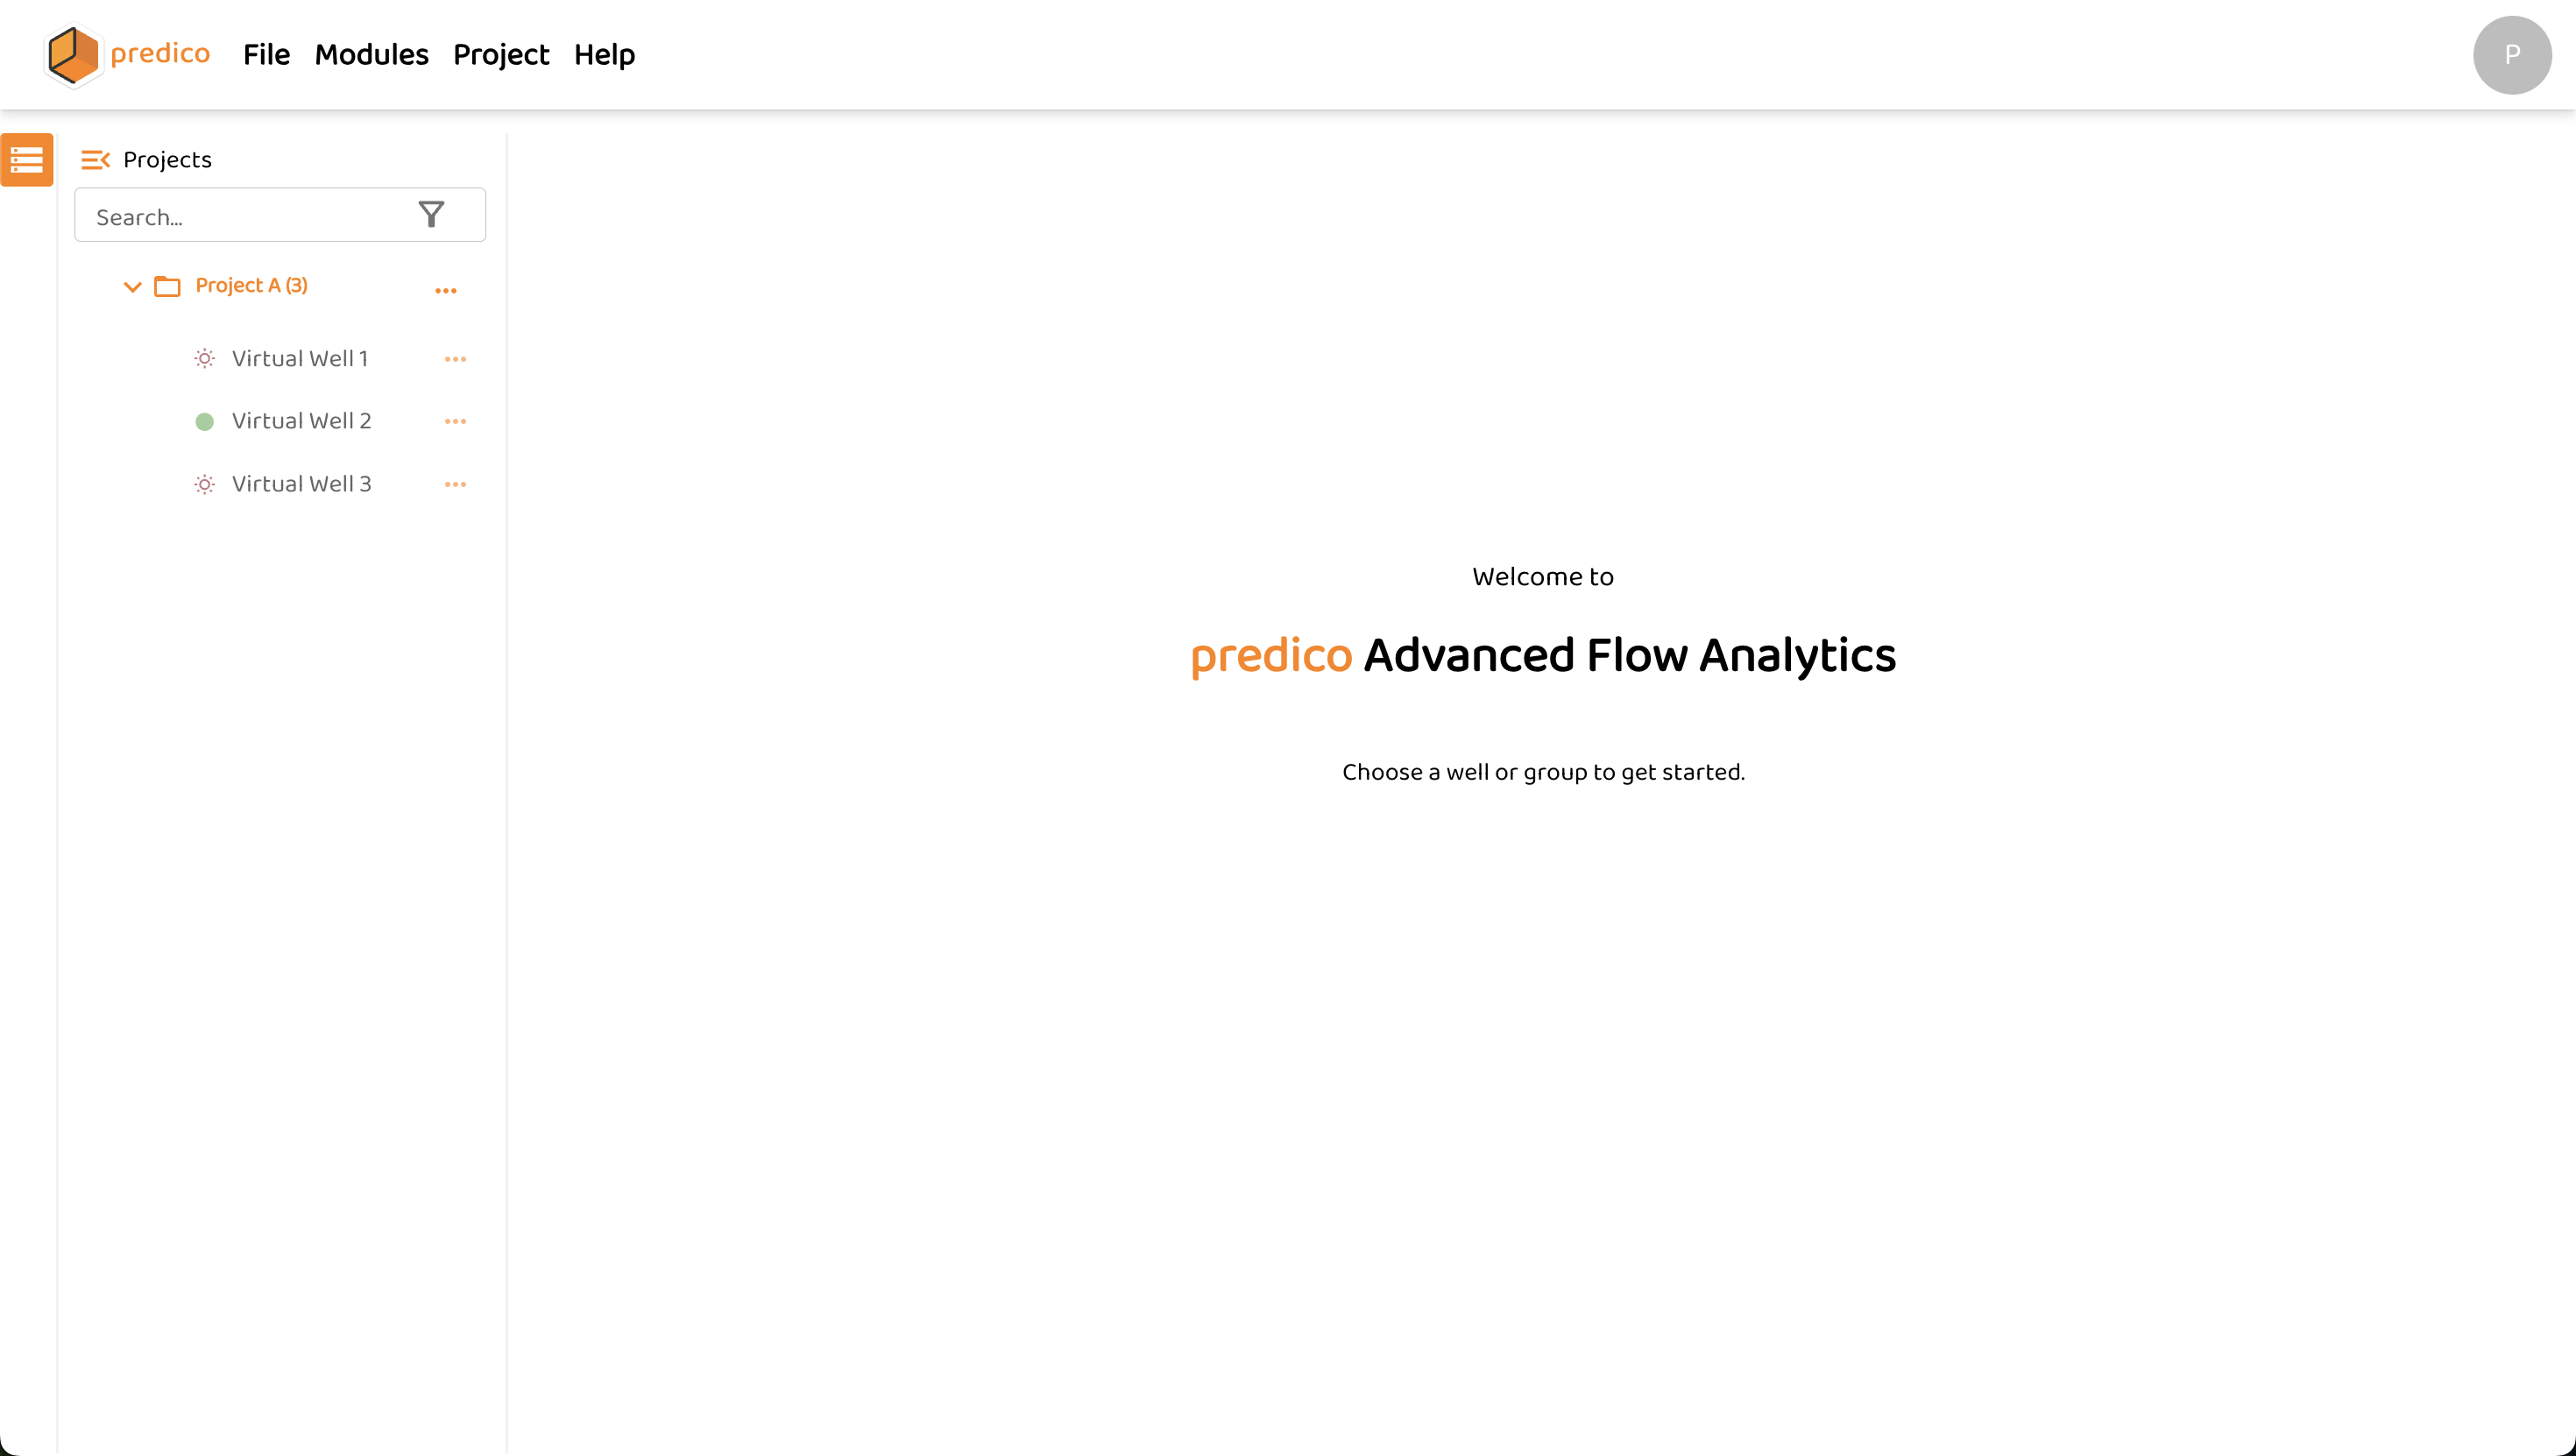
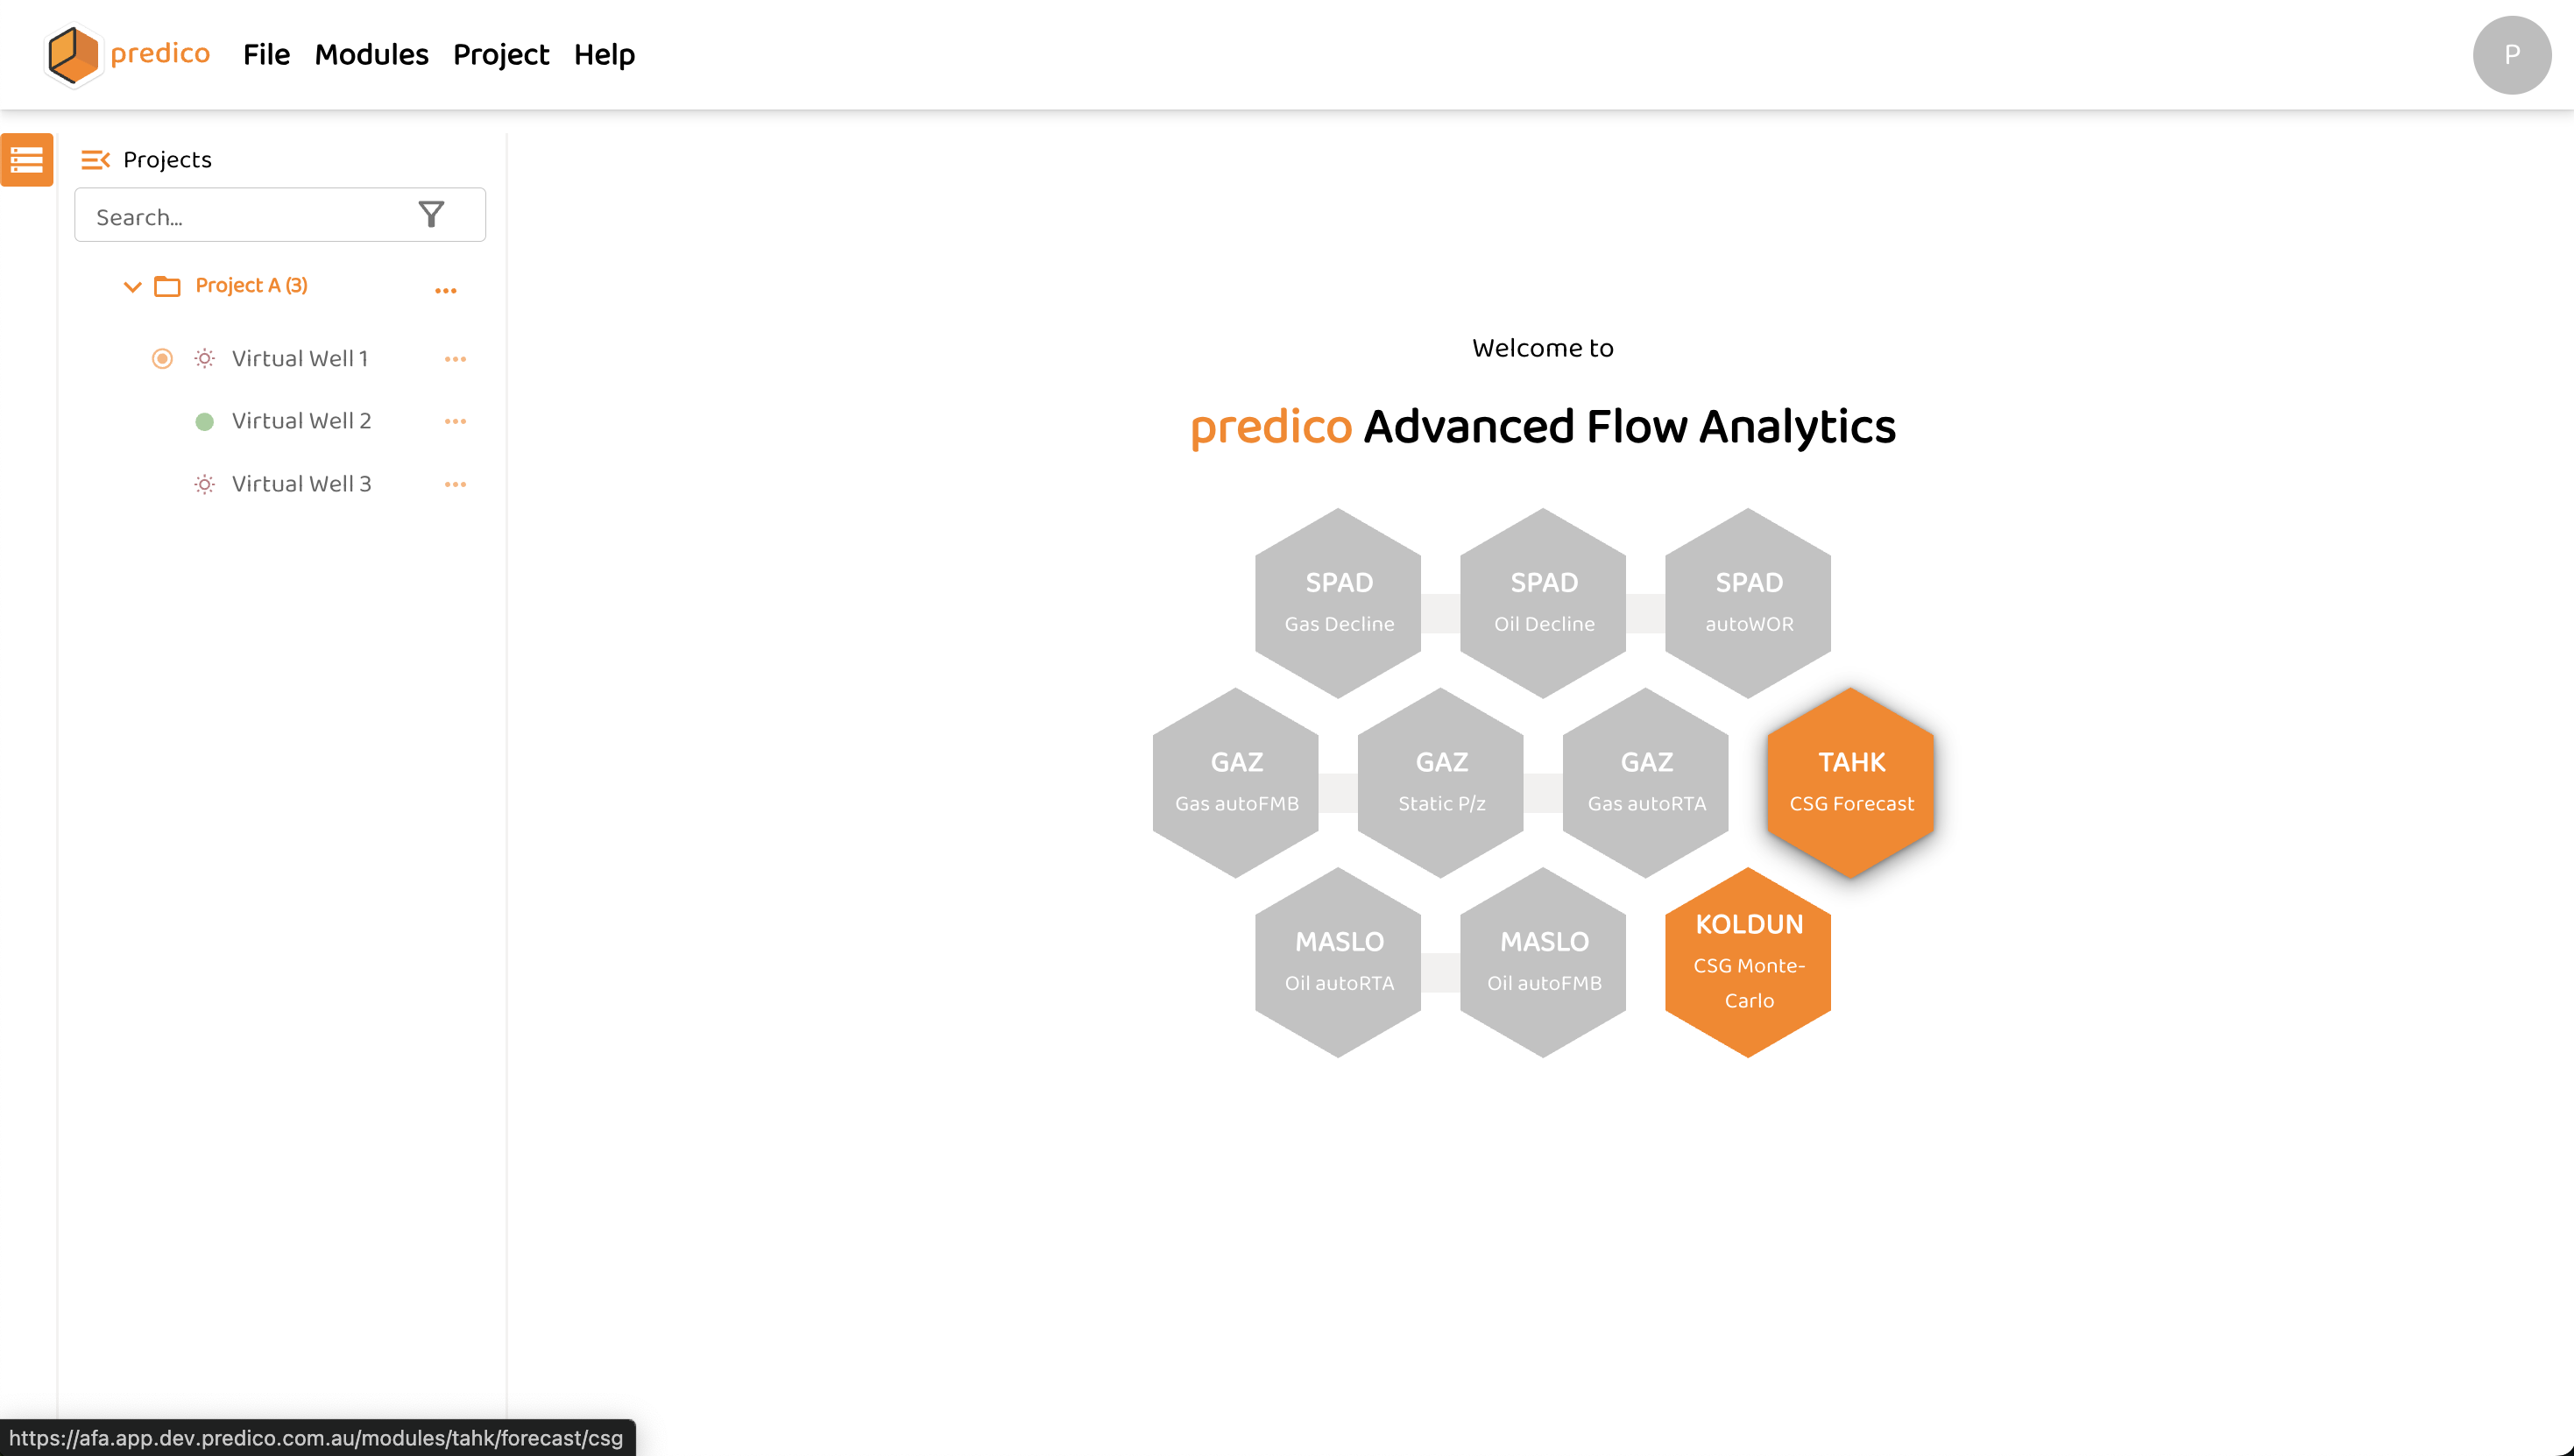
Now, the workflow to access any module is similar to a Normal Well, just select a Virtual Well, and the modules available for this well will show in orange (the modules grey out are not available for analysis at the moment), as shown in the following figure:
The procedure to create a Virtual Well in Group Level is exactly the same, the user just need to create a Group first.
How to use TAHK CSG in a Virtual Well:
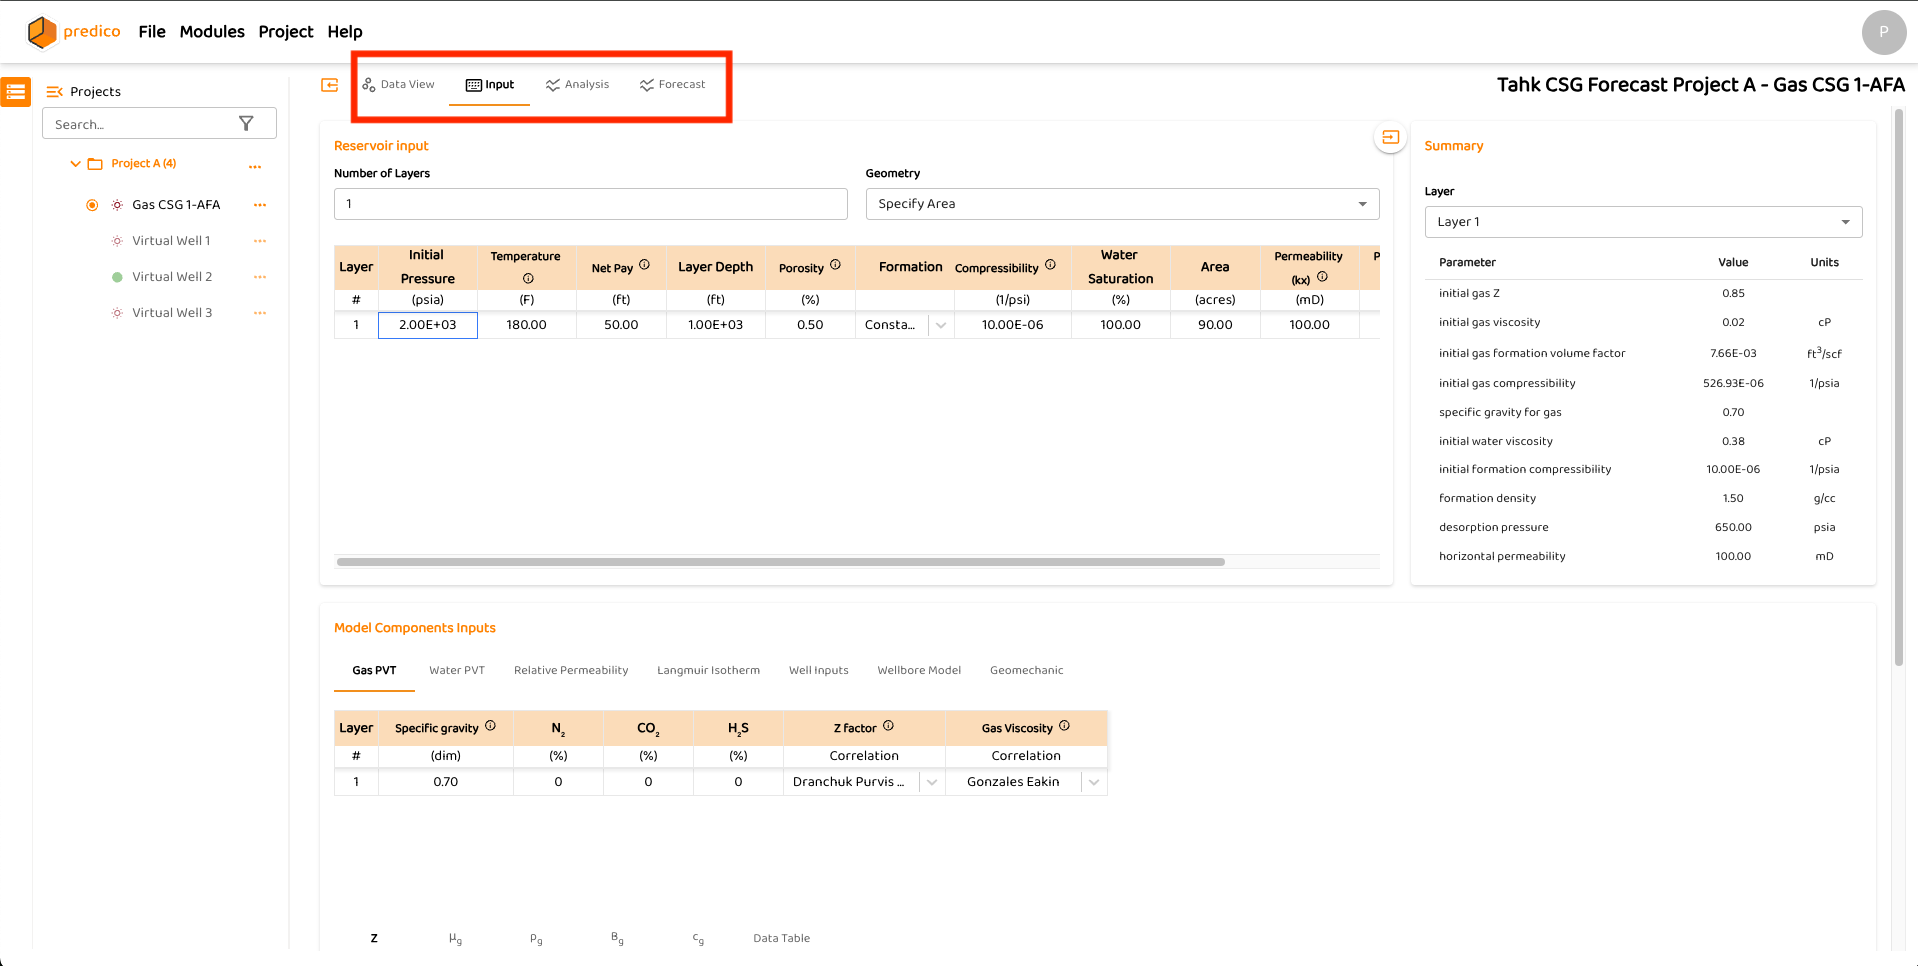
The TAHK: Coal Seam Gas (PSS) Forecast module for a Normal Well (with data available for analysis) contains four tabs for navigation: Data View, Input, Analysis, and Forecast.
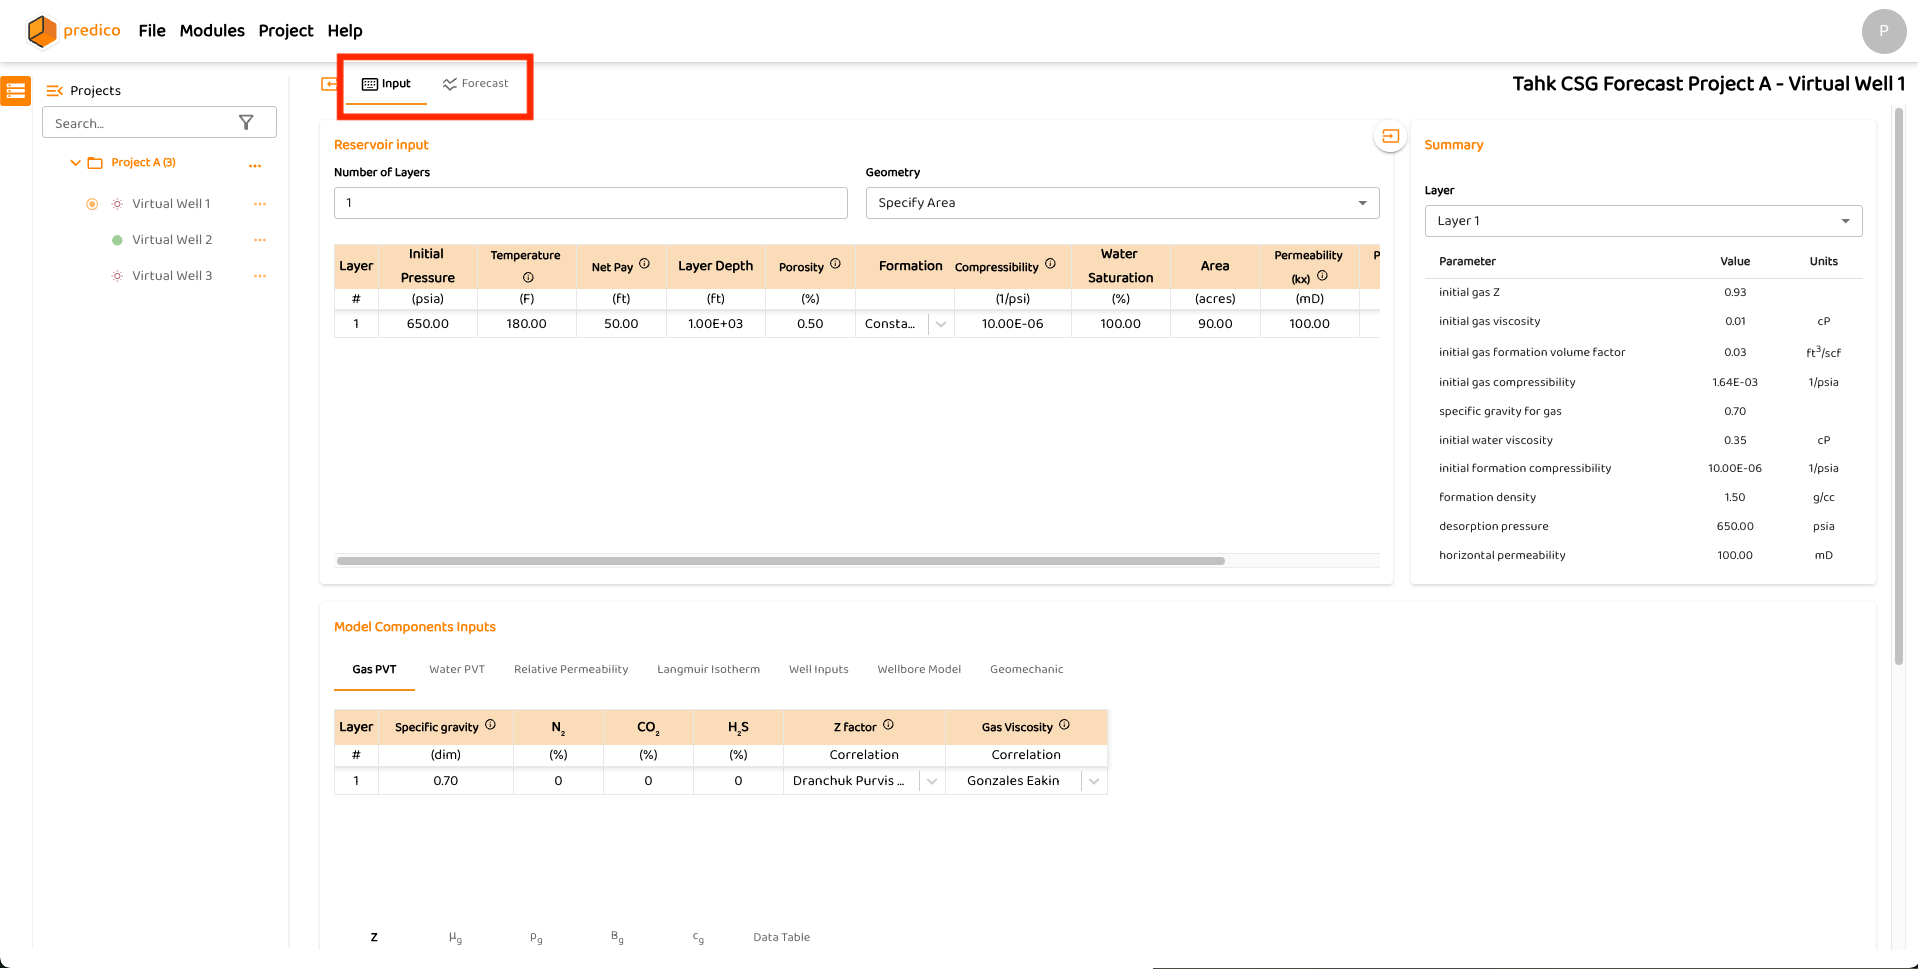
For a Virtual Well, data is not necessarily required. Therefore, this module only displays two tabs — Input and Forecast — as shown in the figures below.
The procedure for using the TAHK CSG model is the same as described TAHK: Coal Seam Gas (PSS) Forecast, except that for a Virtual Well the user only needs to work within the Input and Forecast sections.
TAHK CSG module for Virtual Well:
TAHK CSG module for Normal Well:
How to use KOLDUN CSG in a Virtual Well:
The KOLDUN: CSG Monte-Carlo module does not require any data to operate. Therefore, whether the user is working with a Normal Well or a Virtual Well, the procedure for using the module is the same as described in the following page: KOLDUN: CSG Monte-Carlo.